Today, I am sharing a tutorial I did for Jennifer Rizzo last month for updating an old lampshade with trim and ribbon. This is an great way to freshen up a faded or stained lampshade.
First, measure the circumference of your lampshade to determine the amount of trim you will need and add a few inches. My lampshade measured 34″ around the widest edge, so I bought a yard each of several different trims and ribbons.
Supplies: Lampshade, trim, scissors, glue gun and glue sticks.
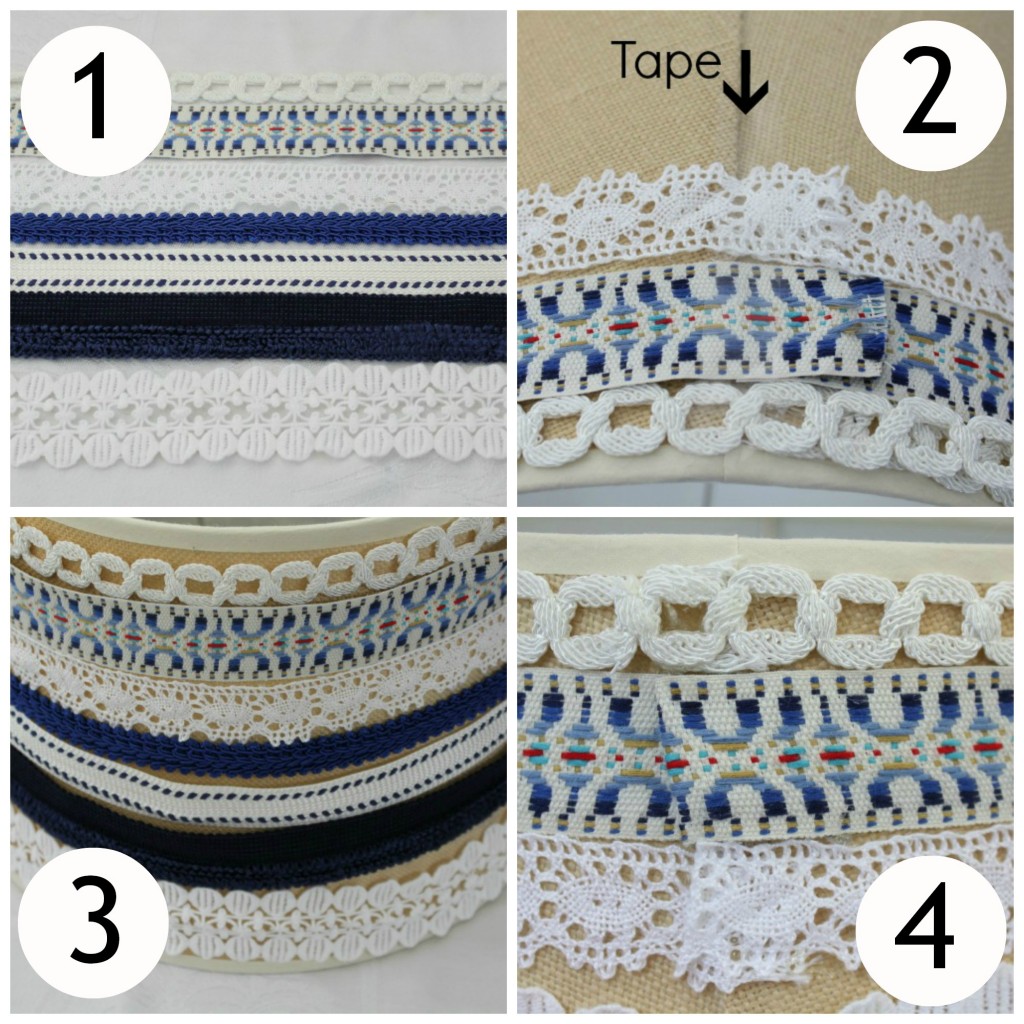
1. Play around with the trim arrangement on a work surface until you get the order that you like.
2. Once you have the order you like you can tape the ribbon in place on the lampshade. Start by taping one end to the back seam then wrap it around the lampshade and tape the other end down overlapping a few inches past the seam. This step helps in making sure you like the arrangement and keeps it straight before you start gluing it in place.
3. Now you are ready to start hot gluing the ribbons in place.
4. You can fold under the ribbon at the back before gluing down for a more finished look.
You can see more of my DIY lighting projects here.


That’s a great way to refurbish a lamp shade!!! Love the blue and white colours you chose.
Thank you!