DIY: Schoolhouse Light
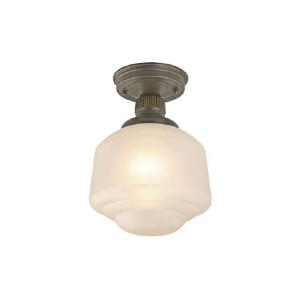
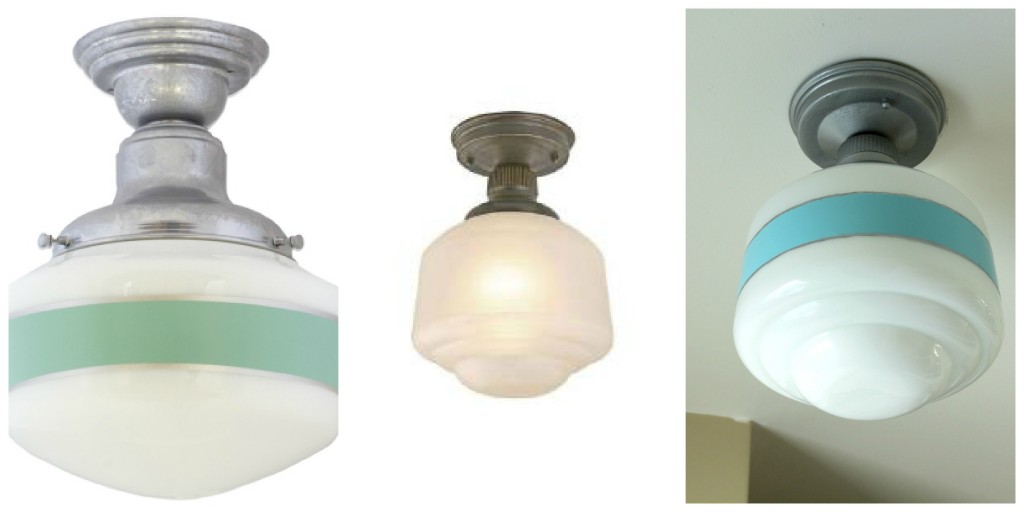
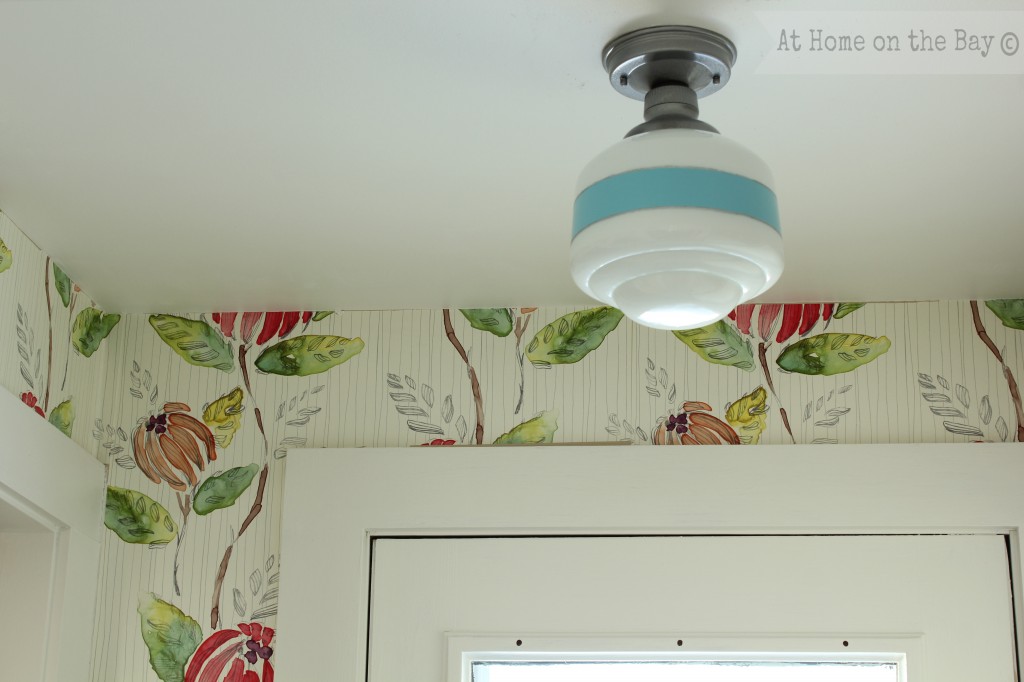
I really love the schoolhouse light on the left from Barn Light Electric. It has a galvanized finish on the canopy and a gorgeous jadite colored band around the glass globe, but with it’s $163.00 price tag for a small light, it is not in my budget. Believe me, if I had the budget, I would run not walk to order one of these. But back to my reality. I found the light in the center photo for $29.00 at Home Depot which looked similar in style and size. After a little spray paint transformation, it looks pretty close (see photo on right) to the original. The whole light cost under $45.00
Here is how I did it.
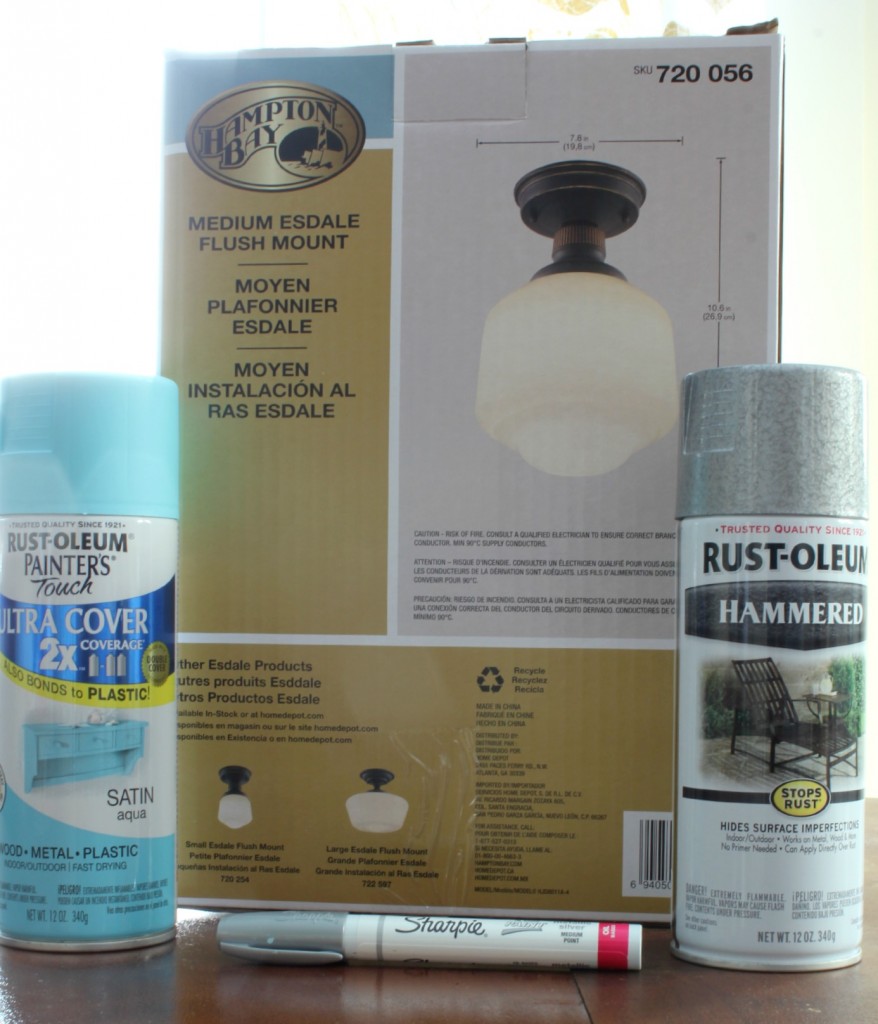
You will need:
Hampton Bay Medium Esdale Flush Mount Light
Rust-Oleum Hammered Spray paint in silver gray
Rust-Oleum Painter’s Touch in Satin Aqua
Sharpie Paint Pen in Silver
Painter’s Tape
(I found everything at Home Depot.)
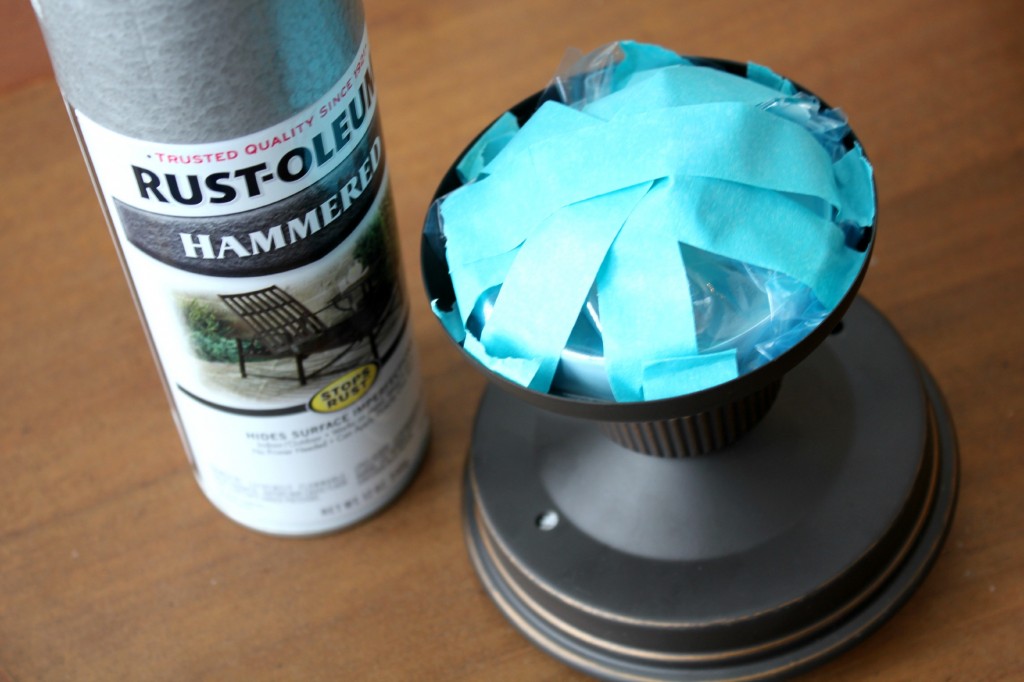
First, I covered the top and bottom of the canopy with plastic and tape to protect it from over spray. To change the bronze finish to a galvanized steel look, I spray painted it with Rust-Oleum spray paint in the silver hammered finish. A few light sprays was all it took.
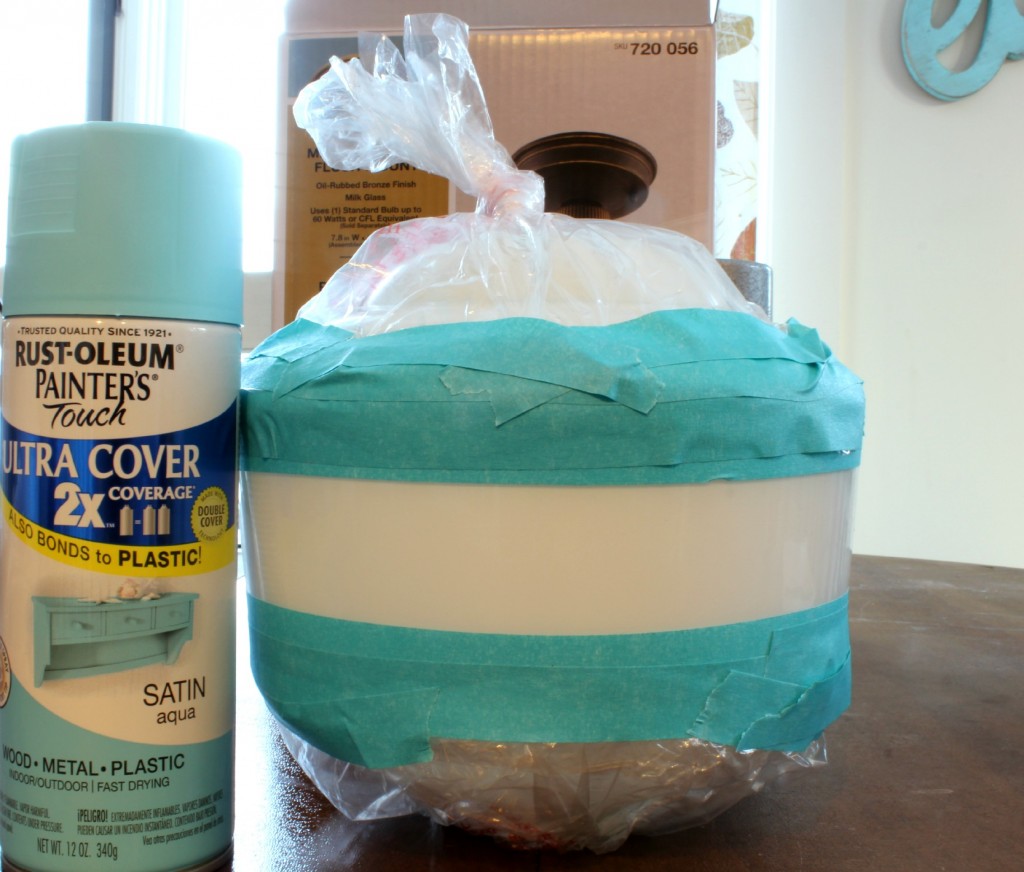
Next, I taped off and covered the globe with plastic, leaving a 2″ strip in the center exposed. I gave it several light coats of Rust-Oleum Painters Touch in Satin Aqua allowing it to dry between coats. It was the same color I used on the Ikea Hack Barnlight. I held a flash light to the center of the globe to check and see how the coverage was with the light shining inside the globe. When I felt like the coverage was even, I gently peeled the tape off.
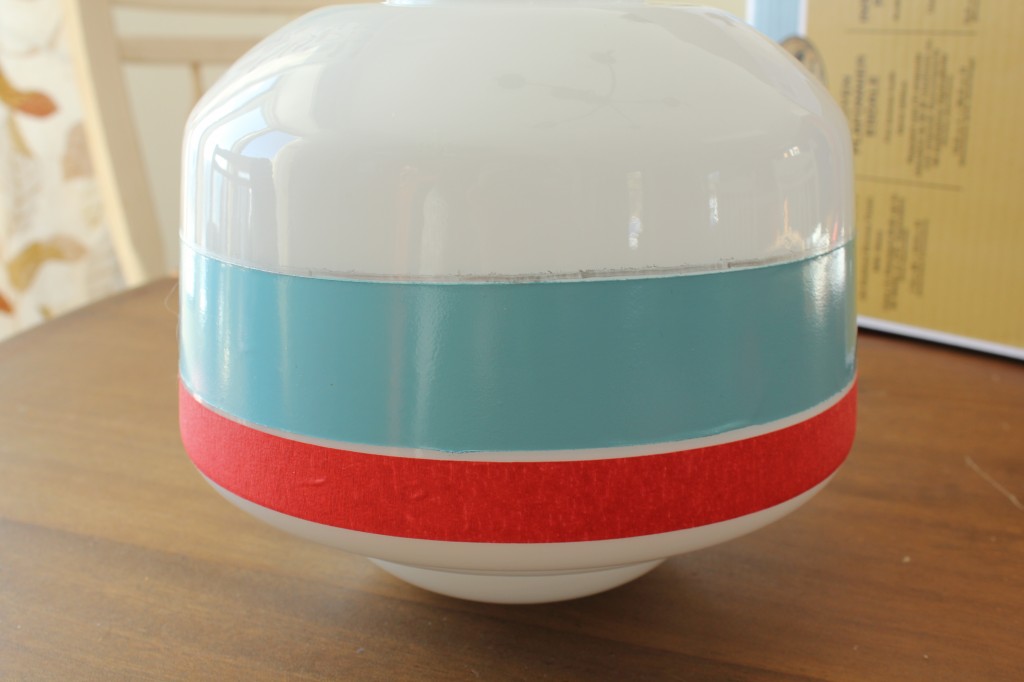
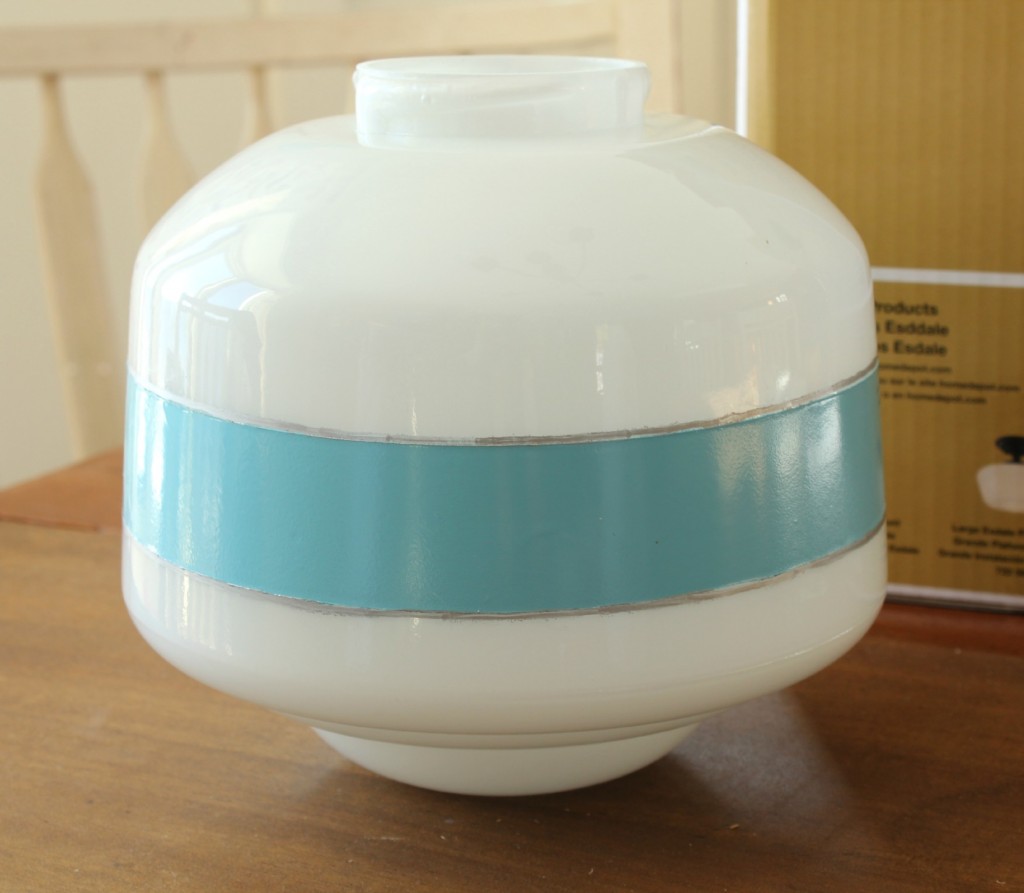
Then, I wanted to add the silver pinstripe detail, so I taped off a little strip around the globe and filled it in with a silver Sharpie pen. For some reason the pen bleed under the tape a little, so I cleaned it up with a cotton swab dipped in acetone nail polish remover.
Then my husband did his magic and installed the light.
I will show you the full tour of the finished hallway next time.

See more DIY lighting projects here.
That turned out so well!! I was bummed when you listed that original in your planning post because it’s SO far out of my price range, but this post has renewed my hope Love it!
Brilliant! Thank you!
That is beautiful! I love old school house lights and this is a great way to get one. Thanks for sharing your painting tips!
Love it. And I’m so glad you went ahead with that wallpaper.
such a smart idea, mary! it looks great!
WOW. Wow. Seriously, this is just awesome. Also…I love your blog.
I’m loving this idea! I’ve been looking for a “farmhouse” ceiling fan and I think you’ve come up with a solution. Those generic white ceiling fans with a schoolhouse light kit would look fabulous with a painted stripe on the light! You come up with the best ideas!
Oh, I LOVE that! Trying to figure out where I need one in my house…I just know it’s SOMEWHERE
You did a really great job…jumping right in to the new year you are. No procrastination for you, I’m impressed BTW If you haven’t already gotten the Ballard design boot tray, and have access to garden ridge…I got mine for there for $3.99…yup …it’s heavy gauge plastic…but works like for me?
This is so very cute! I love the retro feel of it and it is brand new so you don’t have to worry about the safety of it like you would with an actual retro/vintage light fixture. I love it, great job!!
I think your light is better than the inspiration picture. The turquoise color is perfect! It looks so pretty against the wallpaper. I can’t wait to see how the rest of your entryway comes together!
terrific job ; I really love the lighting!
xoxo
Karena
2013 Artists Series
Mary, your schoolhouse light is so cute! We stopped by to check out your fun blog! What a gorgeous home and place to live. Someday we would love to go to Maine! Thanks for stopping by our Strut Your Stuff Saturday! Have a great 2013 and we hope to hear from you again soon! -The Six Sisters
Seriously! I bought the original for my girls bathroom – blue stripe and all – your version is fabulous! Pinning this great idea!
Kelly
This is FABULOUS! You did such a great job…thank you for sharing. I already have the aqua spray paint, just need the rest. I just replaced my kitchen light fixture but I think this would be an awesome replacement in my laundry area!
Wow! It looks so nice. I really love the colour you chose and it looks great in the hallway. I love the wallpaper by the way.
Those kind of lights are my favorite, but always so expensive. I love your creativity to get the look without the high price! Thanks for sharing your great tutorial!
Allison
Hi – love this DIY lighting!! Can I ask if you did a post about the wall behind the lighting? I am soo in love!! Thanks
It looks great! I love the colors and the price. Well done!
Have a great day.
Pam
Mary I love your light transformation! I am looking at buying those lights from HD for my boys bathroom.
total awesomeness!!! for the life of me I can’t figure out why barn light electric lights are soooo expensive!!! Yours looks so great! thanks for sharing – I’m pinning this!
We picked up several lights like these off ebay cheap as we are redoing our farmhouse. I like the idea of adding a stripe to some of them. Thanks for sharing!
Gorgeous! By golly, between this and your pillowcase with lace edging you’ve made me a follower for life! Found you via lovely Pinterest.
Wow, well done I love it. I am so tempted to do this too with the light i have in my toilet. So torn now!!! M x
Have you had any trouble with the globe falling off? This particular light fixture from Home Depot has negative reviews for this problem.
What a great idea!!!!! You are one smart and creative cookie!
Mary K Ware
Darling! Two years later, has the paint stayed on well? Any peeling?
Yes, the paint still looks great …Jenny!